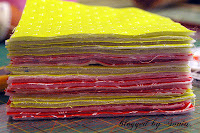
A few years back I purchased a lovely little bundle of fabric coasters at a craft fair, and everyone comments on them, so when making my quilted placemats that I sold through my etsy store during the year I thought ....mmm miniature versions of these would be QUILTED COASTERS perfect Christmas Gifts!!!
So when cutting and sewing on mass making Christmas Gifts, I thought you might like me to share this one, so I snapped whilst sewing and pressing and here is a little tutorial for you.
They are so easy, and you can whip up a couple of sets in less than an hour, they make a great gift and if you can sew in a straight line, you got it done!!!
Ingredients
Do you remember my happy mail earlier in the week.
- 4 fat quarters will make you 4 gifts of 6 coasters each. {When choosing your fabric, think that a pretty bold print is great for the top and the bottom should be a little plainer - but they can be used both sides as well}
- Thin Fusible Pellon {wadding}
Method
- From each fat quarter cut 12 squares measuring 5 inches each. A total of 48 squares.
- From the Fusible Pellon cut 24 squares measuring 5 inches each.
- Iron the Pelon to the wrong side of the back fabric.
- I am not much a pinner, but if you are you should pin right sides together now, make a nice little pile.
- Starting in the middle of one side, sew around your square using a 1/4 inch seam, leaving a little gap about 1- 11/2 inches is enough.
- Clip your corners {don't cut your stitches though}.
- Time to sit back with some TV if your doing a massive load like I have with a chopstick and turn them all inside out. Poking that chopstick into the corners.
- Time to get pressing, be sure that your opening is turned in.
- Top stitching and Quilting comes next - I like to make my stitch a little bigger on the machine, than when I stitch seams closed, to quilt with and top stitch. You can quilt any pattern you like - but following my placemats just three lines around the edge is what I have done. - This is achieved by working your top stitching row close to the the edge make sure you over sew a few of your first stitches when completing the row. Then line your presser foot up with the edge of your first row and sew around completing another square and so on... You get the picture!!
- Trim up all threads, and your complete.
- I like to tie them into little bundles of six ....see how pretty.
Now will you be receiving one of these ....bet your wishing your on my Christmas Nice List!!!
But if your not in the mood for sewing the following sets are for sale and will be up in my etsy store or on facebook shortly alternatively email me on the below address.
 |
| Set of 6 Coasters made from Riley Blake Bloom & Grow Fabric $10 + postage |
 |
| Set of 6 Quilted Coasters made from 'It's a Hoot by MoMo for MODA $10 + postage |
 |
| back of the above collection |
Each of the above photos shows the top and the bottom - 1 set of Flowers on green backs, and 1 set of baskets on red backs - both from the summertime collection.
Each set of 6 Quilted Coasters is $10 + postage.
Email me on info@foreveralways.com.au if you wish to purchase them.


Lvely coasters. Likes the way you used three lines of stitching. Thanks for tute.
ReplyDeleteSuch wonderful fabrics. Thanks for the great tutorial. Might have to whip some of these up!
ReplyDeleteThis s a great tut...would you like to share this in December for a Comfort and JOY theme on my blog which is a guest blog www.sewwequilt.com I believe many would love your choices...
ReplyDeleteThis comment has been removed by the author.
ReplyDeleteThe tutorial is awesome! These coasters are beautiful!
ReplyDelete